How to Make a Presence in Moodle in 4 Steps

If you have installed Moodle to develop an online learning system, you have to learn how to create a presence in Moodle to record student attendance in classes or specific lessons.
However, as one of the best Learning Management Systems (LMS), Moodle does not come with a built-in feature for recording students who are absent from class. So you need to use a plugin. Therefore, you will need to use a plugin.
So, how do you create a presence in Moodle using a plugin? What plugin do you need? Follow the complete tutorial below!
Table of Contents
How to Create Presence in Moodle Easily
To create presence in Moodle, we’ve divided the process into four main steps: (1) downloading and installing the plugin, (2) creating an attendance list, (3) adding attendance details, and (4) adding students to the presence.
Step 1: Download and Install the Presence Plugin
Since the Moodle does not provide a built-in attendance feature, you need to add this feature using a plugin. Here’s how to download and install the Moodle presence plugin:
- Download the Attendance plugin from Moodle’s official website at https://moodle.org/plugins/.
- Follow the tutorial for installing a plugin in Moodle until completion.
You can add this plugin whether Moodle is still in development on localhost or already in production. Once you’ve successfully installed the Attendance plugin in your Moodle, just to create the student attendance list.
Step 2: Creating an Attendance List
To create an attendance list in Moodle, you must have Administrator access. If you already have that access, here’s how to create an attendance list in Moodle:
- Log in to Moodle as Administrator.
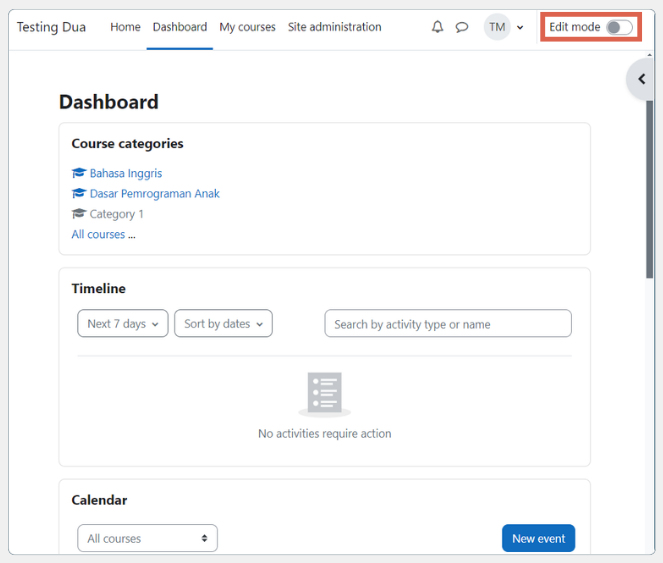
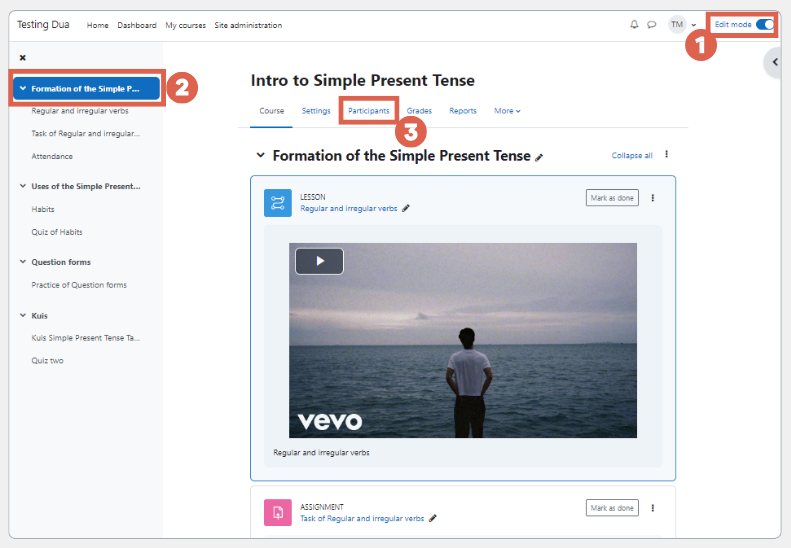
- Activate Edit mode in the top right corner.
-
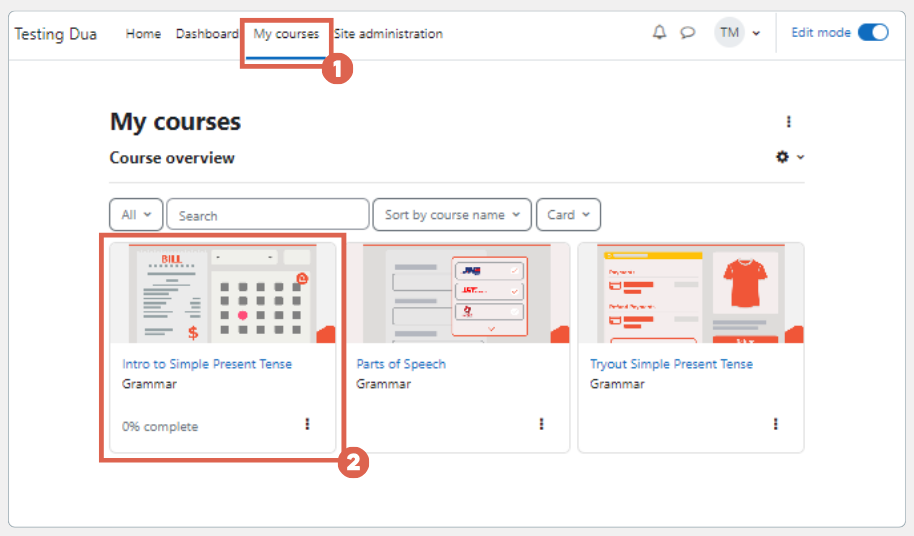
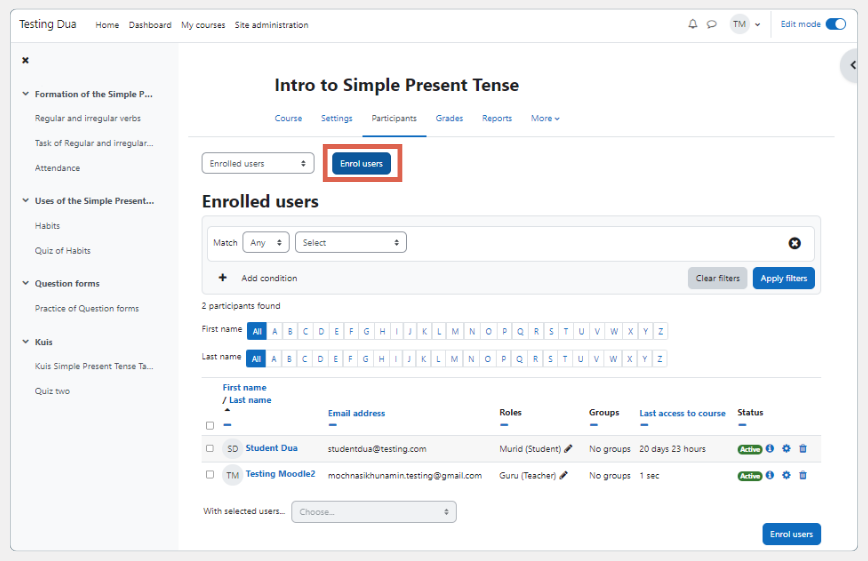
Go to the My courses tab > select the material you want to add attendance to. If you don’t have one, create a lesson by following the tutorial on how to create a class in Moodle.
- Click Add an activity or resource
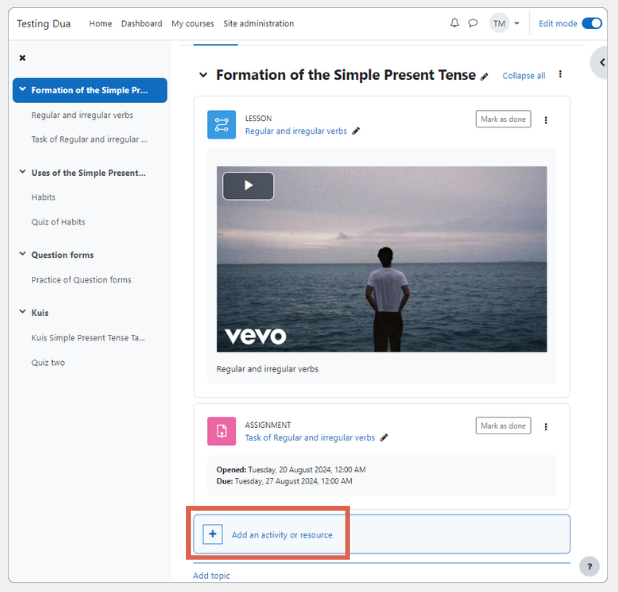
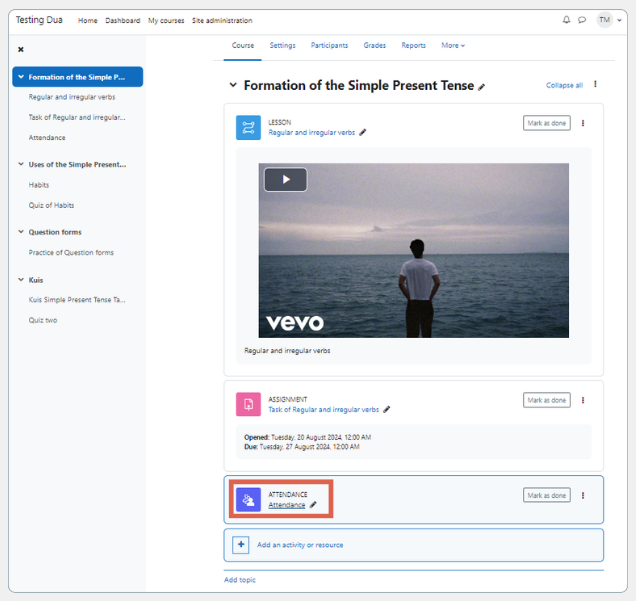
- Select Attendance. This feature appears after you install the previous plugin
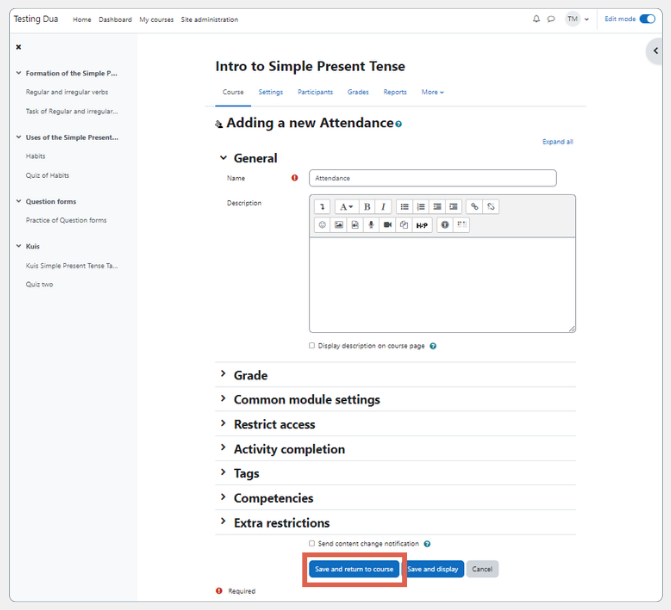
- Enter the attendance information and settings. For testing purposes, you can simply add a Name, then click Save and return to course
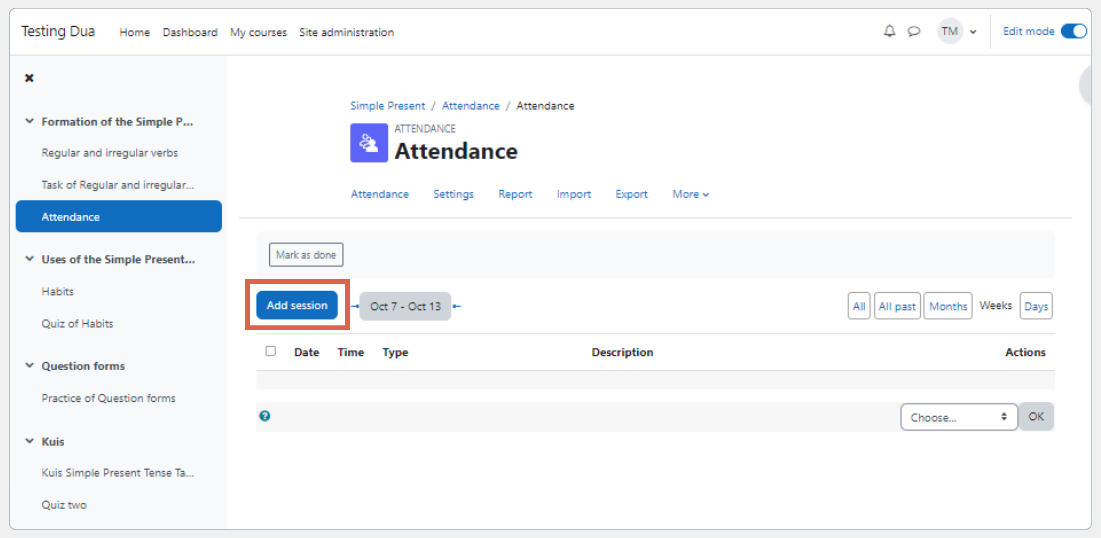
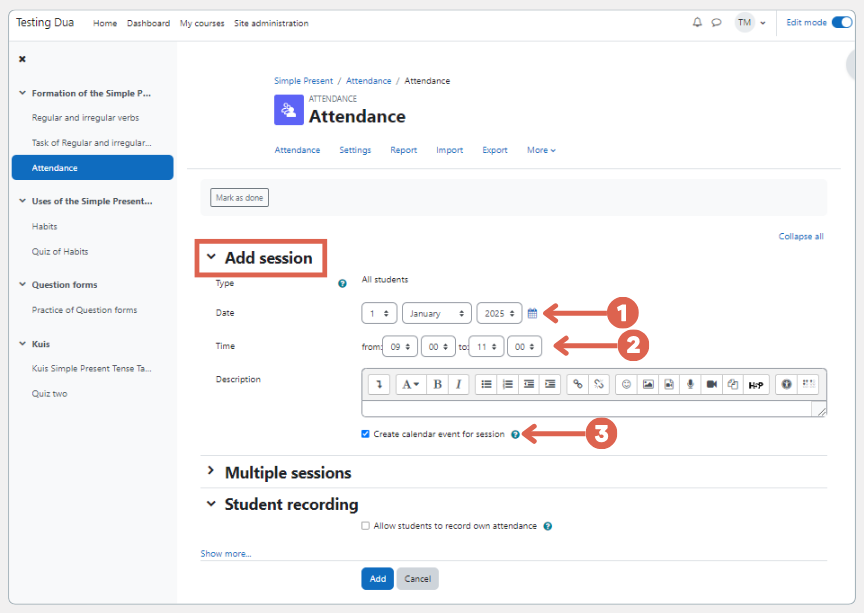
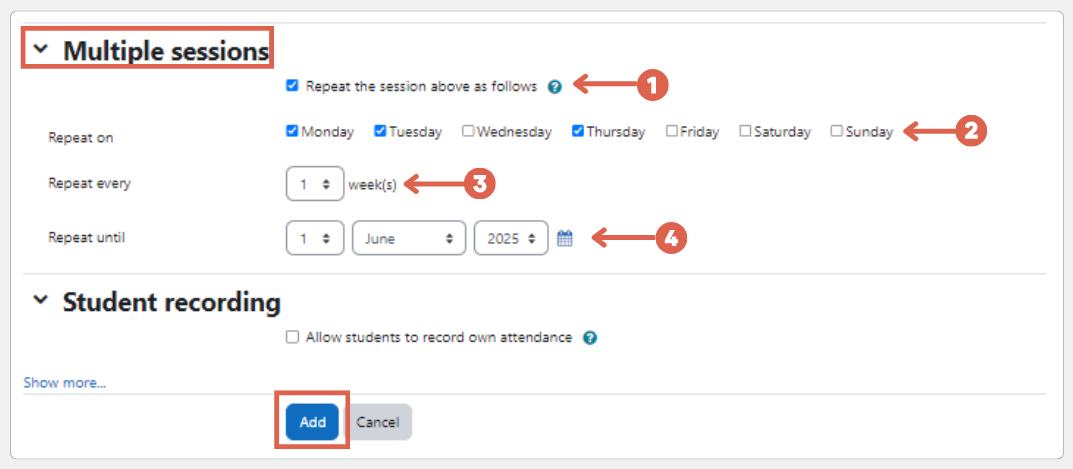
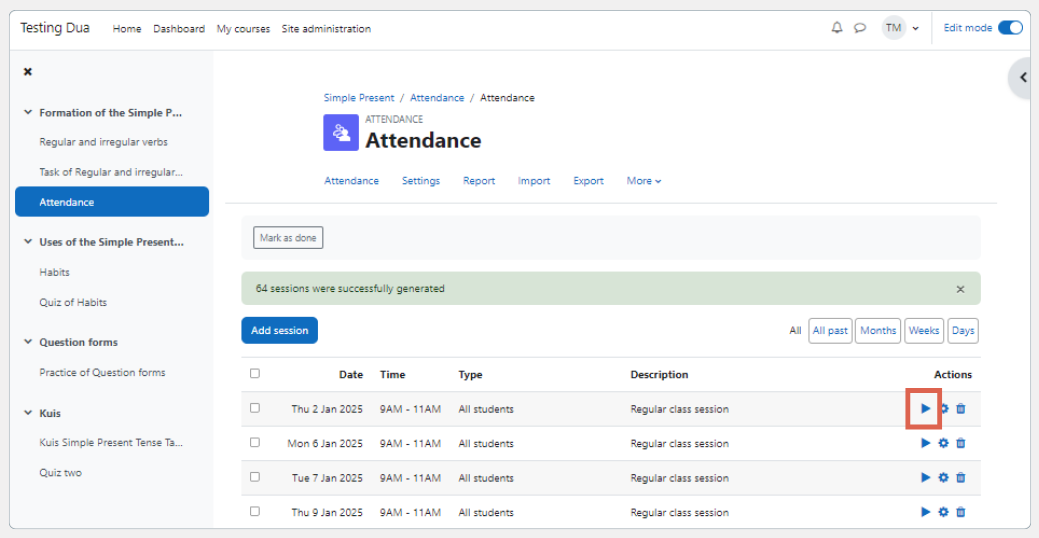
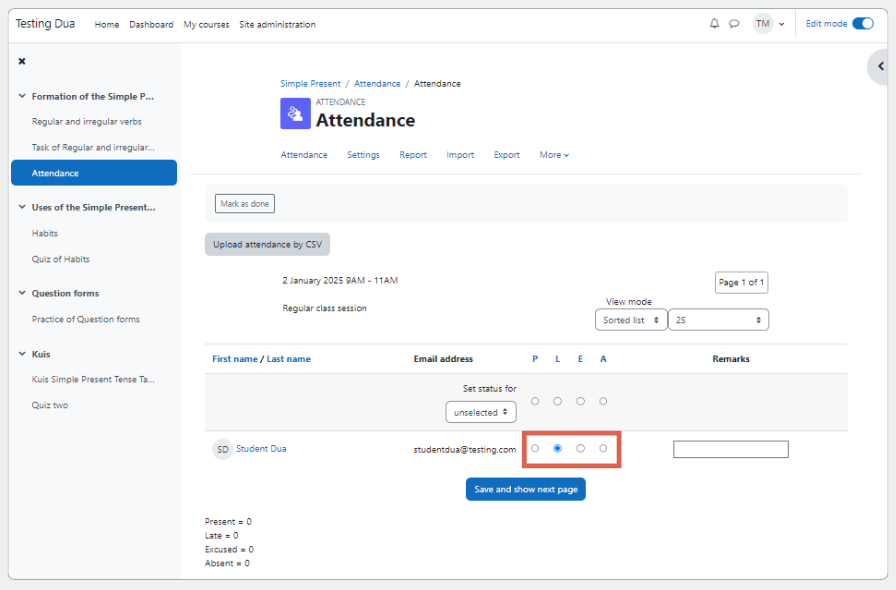
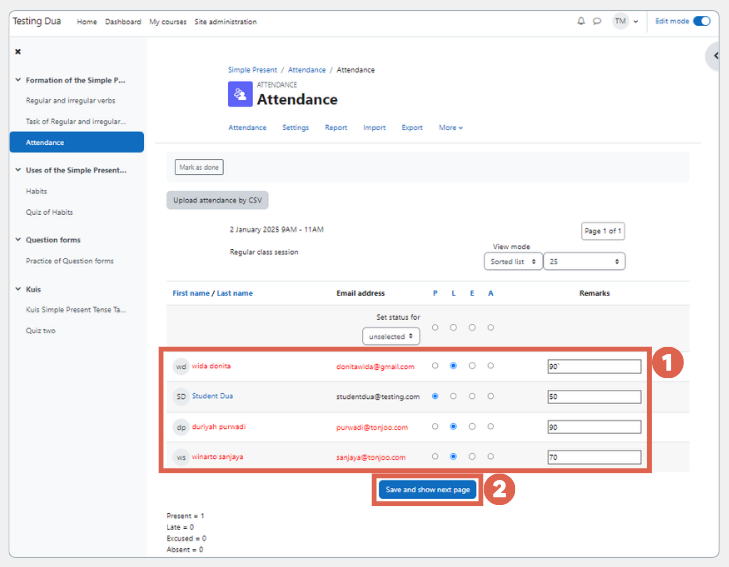
Now you have successfully created your presence. Next, you need to add attendance details. What details do you need to add?


Anisa K. Juniardi
Spending the last 5 years immersed in the world of web development has shaped a professional perspective on technology. The primary focus is deconstructing development workflows and the latest web technologies into practical guides. Firmly believing that complex technology becomes far more valuable when communicated clearly and backed by deep research to support the developer community.

Lets Work Together!
Create your ideal website with us.